Textile arts offer a beautiful blend of creativity, tradition, and functionality. Whether you’re looking to craft a handmade gift, add a personal touch to your home, or simply explore a new hobby, DIY textile arts are a wonderful way to express your artistic side. ArtPlusCraft, a blog dedicated to exploring the world of art and craft, provides a wealth of information and inspiration to get you started on your textile art journey. In this article, we will dive into the basics of textile arts, explore simple projects suitable for beginners, and provide tips and tricks to help you succeed in your DIY endeavors.
What Are Textile Arts?
Textile arts encompass a wide range of creative practices involving the manipulation of fabrics, fibers, and yarns. This includes traditional crafts such as weaving, knitting, and embroidery, as well as more contemporary forms like fabric painting and quilting. Textile arts can be both functional and decorative, allowing crafters to create everything from clothing and accessories to wall hangings and home decor.
At its core, textile art is about transforming raw materials into something beautiful and meaningful. With the rise of DIY culture, more and more people are discovering the joys of creating their own textile art pieces. ArtPlusCraft offers resources and guidance for those interested in exploring this versatile art form, making it accessible to beginners and experienced crafters alike.
Why Start with DIY Textile Arts?
Starting with DIY textile arts offers numerous benefits. Not only do you get to create unique and personalized items, but the process itself can be incredibly therapeutic. Engaging in textile arts allows you to focus on a task, reducing stress and promoting mindfulness. Additionally, creating your own textile art can be a sustainable alternative to mass-produced goods, as you can reuse materials and create items that are built to last.
For beginners, the world of textile arts can seem overwhelming. However, with the right guidance and a few simple projects, anyone can begin to explore this rewarding hobby. ArtPlusCraft provides step-by-step tutorials and tips to help you get started, ensuring that you have the knowledge and confidence to create beautiful textile art pieces.
Essential Tools and Materials
Before diving into your first textile art project, it’s essential to gather the necessary tools and materials. While the specific items you’ll need will depend on the type of textile art you choose to pursue, here are some general supplies that are commonly used:
- Fabric: Choose fabrics that suit your project, whether it’s cotton for quilting, wool for felting, or linen for embroidery.
- Needles and Thread: Essential for sewing, embroidery, and other stitching projects. Consider investing in a variety of needle sizes and thread types.
- Scissors: Sharp fabric scissors are a must for clean cuts. A small pair of embroidery scissors can also be handy for detailed work.
- Pins and Pincushions: These will help you hold fabric pieces in place while you work.
- Measuring Tape: Accurate measurements are crucial for any textile project.
- Yarn and Knitting Needles: If you’re interested in knitting or crochet, these are your basic tools.
- Embroidery Hoops: Useful for keeping your fabric taut while you stitch.
- Marking Tools: Fabric markers or chalk are helpful for tracing patterns and designs.
ArtPlusCraft recommends starting with basic tools and materials, then gradually expanding your collection as you explore different textile arts. Investing in quality supplies will make your crafting experience more enjoyable and yield better results.
DIY Textile Arts: Simple Projects to Get You Started by ArtPlusCraft
For those new to textile arts, starting with simple projects can build your confidence and skills. The following are some beginner-friendly projects recommended by ArtPlusCraft, each offering a unique way to explore different textile techniques.
1. Hand-Stitched Fabric Coasters
Hand-stitched fabric coasters are a fantastic project for beginners, allowing you to practice basic sewing techniques without committing to a large or complicated project. To make these coasters, you’ll need:
- Fabric scraps in your choice of colors and patterns
- Matching thread
- A sewing needle
- Scissors
- Pins
Instructions:
- Cut your fabric into squares, roughly 4×4 inches.
- Align the two fabric squares with the right sides facing inward, against each other
- Pin the squares together and sew around the edges, leaving a small opening for turning.
- Turn the fabric right side out and use a hand stitch to close the opening
- Press the coasters with an iron to give them a neat finish.
This project allows you to experiment with different fabrics and patterns, creating a set of unique coasters that add a personal touch to your home.
2. Embroidered Wall Art
Embroidery is a classic textile art that offers endless possibilities for creativity. Creating a simple embroidered wall art piece is a great way to learn basic stitches and showcase your work.
To create embroidered wall art, you’ll need:
- An embroidery hoop
- A piece of fabric
- Embroidery thread
- An embroidery needle
- Scissors
Instructions:
- Place your fabric in the embroidery hoop, pulling it taut.
- Choose a design—this can be a simple shape, a letter, or a small scene.
- Use basic stitches like the backstitch or satin stitch to bring your design to life.
- Once complete, trim the excess fabric and display your embroidery in the hoop as a piece of wall art.
ArtPlusCraft suggests starting with simple designs and gradually trying more complex patterns as you become more comfortable with embroidery techniques.
3. No-Sew Fleece Blanket
If you’re looking for a quick and easy project, a no-sew fleece blanket is perfect. This project requires no sewing skills, making it an excellent option for beginners or those short on time.
To make a no-sew fleece blanket, you’ll need:
- Two pieces of fleece fabric, each measuring 2 yards in length
- Scissors
Instructions:
- Lay the two pieces of fleece on top of each other, aligning the edges.
- Cut a 4-inch square from each corner of the fabric.
- Along each edge, cut 4-inch strips, about 1 inch wide.
- Tie the strips into knots to secure the two pieces of fabric together.
- Continue tying knots around the entire blanket until all edges are finished.
This project is a great way to create a cozy blanket without any sewing. Plus, it’s an excellent gift idea for friends and family.
4. Basic Knitted Scarf
Knitting is a versatile textile art that allows you to create wearable pieces. A basic knitted scarf is an ideal first project for beginners, introducing you to fundamental knitting techniques.
To knit a scarf, you’ll need:
- A ball of yarn (choose a medium-weight yarn for beginners)
- A set of knitting needles in size 8 or 9
Instructions:
- Cast on 20 to 30 stitches, depending on the desired width of your scarf.
- Knit every row until the scarf is as long as you want it to be.
- Bind off the stitches and weave in the loose ends with a yarn needle.
ArtPlusCraft recommends practicing the knit stitch (also known as the garter stitch) before moving on to more complex patterns. Once you’ve mastered the basic scarf, you can experiment with different yarns and stitches.
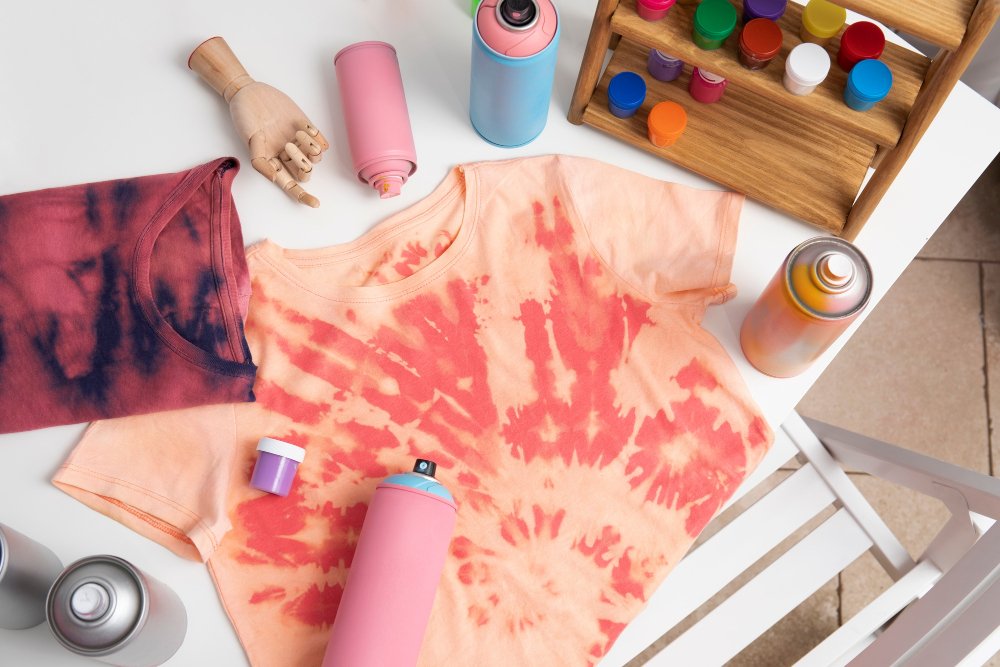
5. Tie-Dye T-Shirts
Tie-dyeing is a fun and colorful textile art that has made a comeback in recent years. It’s an excellent project for beginners, allowing you to create vibrant, one-of-a-kind designs on fabric.
To tie-dye a t-shirt, you’ll need:
- A plain white cotton t-shirt
- Fabric dye in your choice of colors
- Rubber bands
- Plastic squeeze bottles
- Plastic gloves
- Plastic bags
Instructions:
- Lay the t-shirt flat and twist, fold, or scrunch it into a design of your choice.
- Hold the fabric in place with rubber bands.
- Mix the fabric dye according to the instructions and pour it into squeeze bottles.
- Apply the dye to different sections of the t-shirt, using as many colors as you like.
- Place the dyed t-shirt in a plastic bag and let it sit for 6-8 hours.
- Rinse the t-shirt under cold water until the water runs clear, then wash and dry it.
Tie-dyeing is a creative and spontaneous process, with no two designs ever being exactly alike. This project is perfect for customizing clothing and accessories with a splash of color.
Tips for Success in DIY Textile Arts
As you embark on your DIY textile arts journey, keep the following tips in mind to ensure success:
- Start Small: Begin with simple projects that allow you to build your skills gradually. As you build confidence, you can take on more complex projects.
- Practice Patience: Textile arts often require time and precision. Take your time with each step, and don’t be discouraged if your first attempts aren’t perfect.
- Experiment: Don’t be afraid to try new techniques, materials, and designs. Textile arts are all about creativity and self-expression.
- Learn from Others: ArtPlusCraft offers a wealth of tutorials and resources, but you can also learn from fellow crafters in online communities or local workshops.
- Enjoy the Process: Above all, remember that textile arts should be enjoyable. Focus on the creative process and the satisfaction of making something with your own hands.
Conclusion: DIY Textile Arts: Simple Projects to Get You Started by ArtPlusCraft
Exploring the world of textile arts can be a rewarding and fulfilling experience. By starting with simple projects, you can develop your skills, express your creativity, and create beautiful, handmade items. ArtPlusCraft is here to guide you every step of the way, offering inspiration, tutorials, and tips for crafters of all levels. Whether you’re stitching a fabric coaster, embroidering a wall art piece, or tie-dyeing a t-shirt, the possibilities are endless. Embrace the joy of DIY textile arts and discover the satisfaction of crafting something uniquely your own.

